
Lighted house numbers can improve nighttime visibility and give an entrance a more finished look, but the buying decision is not just about choosing a font. Size, viewing distance, power source, wall material, spacing and cable routing all affect the final result.
This guide focuses on the decisions worth making before you order or drill. The goal is to help you choose a setup that fits the property rather than forcing the property to fit the product.
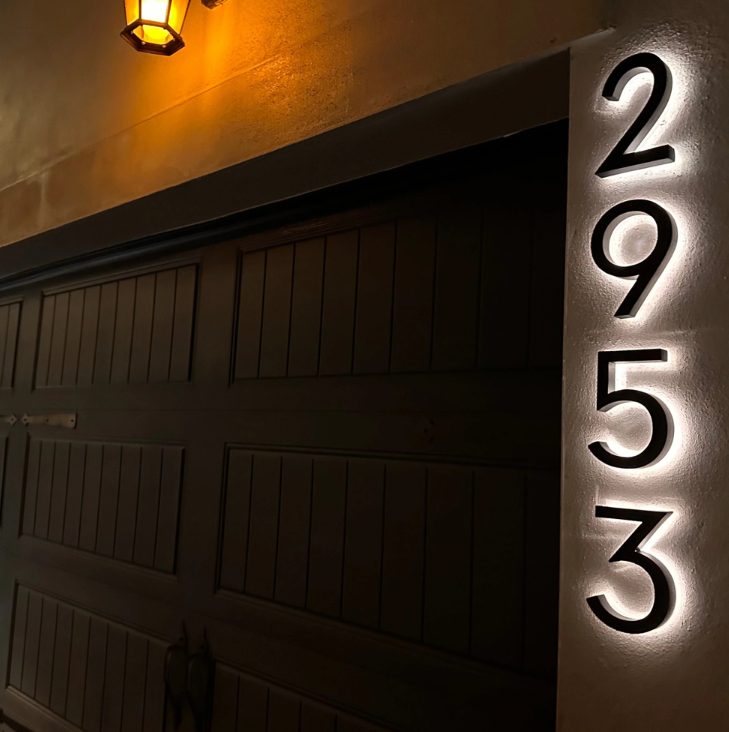
Start with viewing distance
Number height should be chosen around how far the address needs to be read from the street or driveway. The merchant’s current sizing guidance uses roughly 5–6 inch numbers for distances up to 75 feet, 6–8 inches around 75–100 feet, 8–12 inches around 100–150 feet, and 12–14 inches beyond 150 feet.
For a deeper look at viewing distance, contrast and character size, read our house number size and street visibility guide .
Choose the power source before choosing the mounting spot
Current product documentation lists four power approaches: hardwired transformer, plug-in transformer, connection to an existing 12V landscape-lighting system, or a solar panel power bank. Each one changes where the numbers can realistically be installed.
| Power option | Best when | Planning issue |
|---|---|---|
| Hardwired | You want the cleanest permanent look | Electrical routing and code compliance |
| Plug-in | A suitable outlet is nearby | Visible cord routing |
| Landscape 12V | You already have low-voltage lighting | Compatibility with the existing system |
| Solar | There is no convenient outlet | Panel location and sun exposure |
If you are deciding specifically between the two most common approaches, see our solar vs. hardwired lighted house numbers comparison .
Check the wall material and layout
The current mounting guidance covers brick, siding, stucco, wood, stone, rock, fences and columns. The exact installation method can still vary by surface, especially if the wall has a cavity, uneven masonry or siding blocks.
The product is sold as individual numbers rather than a single plaque, which gives you flexibility but also makes spacing important. Use the supplied full-size template or make your own paper mock-up before drilling.
Think about daytime and nighttime visibility
Illumination can make an address easier to identify after dark, but lighting does not replace proper sizing, contrast and placement. Numbers that are too small or partially hidden may remain difficult to read even when illuminated.
Before committing to an illuminated system, read our Are Lighted House Numbers Worth It? guide to evaluate whether lighting solves a real visibility problem for your property.
Allow enough time for installation
The merchant currently describes a typical DIY installation as about 1–2 hours, with mounting hardware, a full-size template and wiring diagrams included. That estimate is most realistic when the power route has already been planned.
Plan the complete address before drilling
One of the easiest mistakes is planning the position of the first digit without considering the full address. Several separate numbers can occupy considerably more space once proper spacing is added.
Create a temporary full-size layout before drilling. View it from the road, driveway and normal approach direction during daylight and after dark.
- Check whether every digit is visible from the road.
- Make sure plants and architectural features do not block the address.
- Check whether parked vehicles could obstruct the viewing angle.
- Confirm that the full address fits the intended wall or column.
- Verify that cable exits remain practical.
Consider the mounting surface
Brick, stone, siding, stucco and wood all present different installation challenges. Uneven masonry may make alignment more difficult, while siding can require additional planning around mounting blocks or wall cavities.
Read the current manufacturer installation instructions for the exact mounting surface before drilling or routing electrical connections.
Check the lighting appearance
LED color temperature and the finish of the physical numbers affect how the installation looks both during the day and at night. A design that looks attractive when illuminated should still provide enough contrast when the lights are off.
Consider the exterior wall color, nearby lighting fixtures and the overall architectural style before choosing a finish.
What to check before ordering
- Distance from mounting location to curb or road
- Total address width, not just individual digit height
- Horizontal versus vertical layout
- Power source and cable route
- Mounting surface
- LED color temperature and finish
- Daytime contrast
- Nighttime visibility
- Sun exposure if considering solar power
- Delivery timing for a made-to-order product
- Current warranty and installation instructions
- Applicable local address-display requirements
Quick questions
Are these articles product reviews?
They are research-based buying guides built from published product specifications, installation information and category-level buying considerations.
Should I choose the number size before choosing the power source?
Start with the visibility requirement and available mounting area, then make sure the selected power system works with that location. Size, placement and power source should ultimately be planned together.
Is solar easier to install than hardwired lighting?
Solar can avoid direct electrical wiring in suitable locations, but it requires adequate sun exposure. Hardwired systems are generally more involved to install but do not depend on daily solar charging.
Do lighted house numbers still need good contrast?
Yes. Daytime readability still depends on the physical numbers standing out from the wall, and nighttime illumination cannot completely compensate for poor sizing or placement.
Should I verify current specifications before ordering?
Yes. Product options, prices, shipping times and policies can change, so verify the merchant’s current product page before purchase.